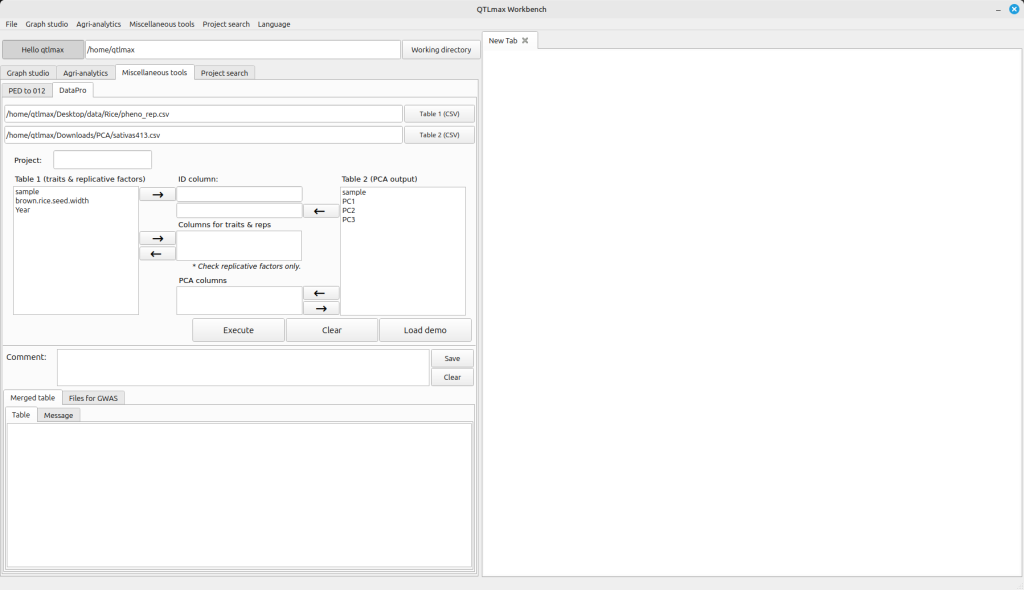
(Figure 1)
In the Table 1 and Table 2 boxes, you need to select the column name for sample names and move it to the “ID column” text box. Similarly, select the column name for phenotype values from the Table 1 box and send it to the “Columns from triats & reps” text box. Please note that given a replicative factor, you need to make sure that its check box is checked. Then, select the column name for PCA values from the Table 2 box and send it to the “PCA columns” text box. Please ensure that you entered a project name in Project text box. After completing all these configurations, press the [Execute] button. You’ll then see the resulting merged table, created by combining the two files, appear on the “Merged table” tab page (Figure 2).
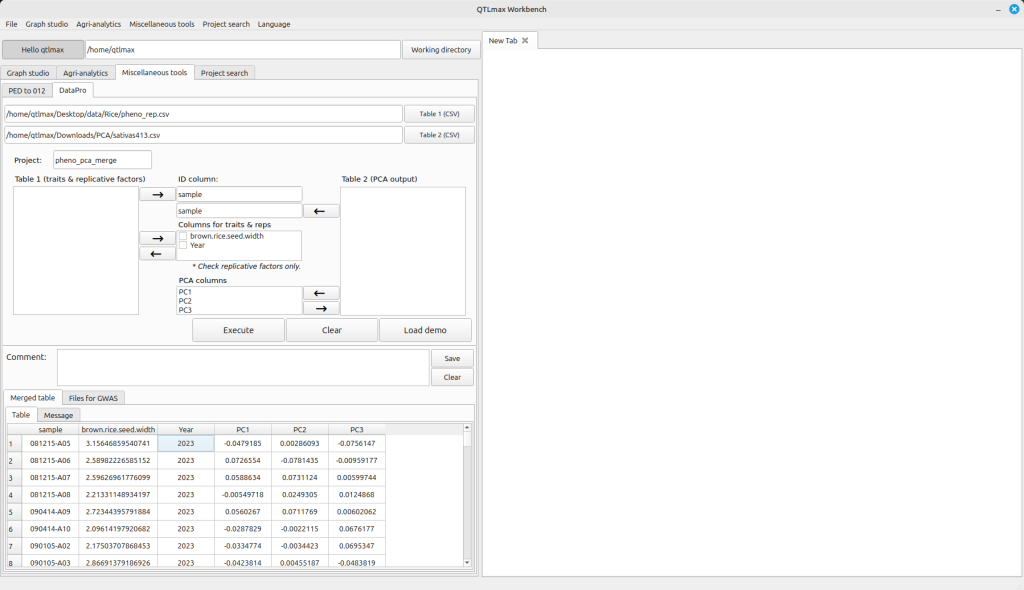
Figure 2
If your original phenotype file contains missing values, the table displayed on the “Merged table” tab will also include them. However, QTLmax doesn’t allow phenotype data with missing values for GWAS analysis. But don’t worry! You can find the merged result files on the “Files for GWAS” tab. In these files, all missing values from the phenotype data will have been removed (Figure 3). Each of these files is structured with a single phenotype column merged with the PCA columns. You can directly access these result files by clicking the [Open the directory] button, which will immediately open the project folder. You can use each file for GWAS works by using QTLmax.
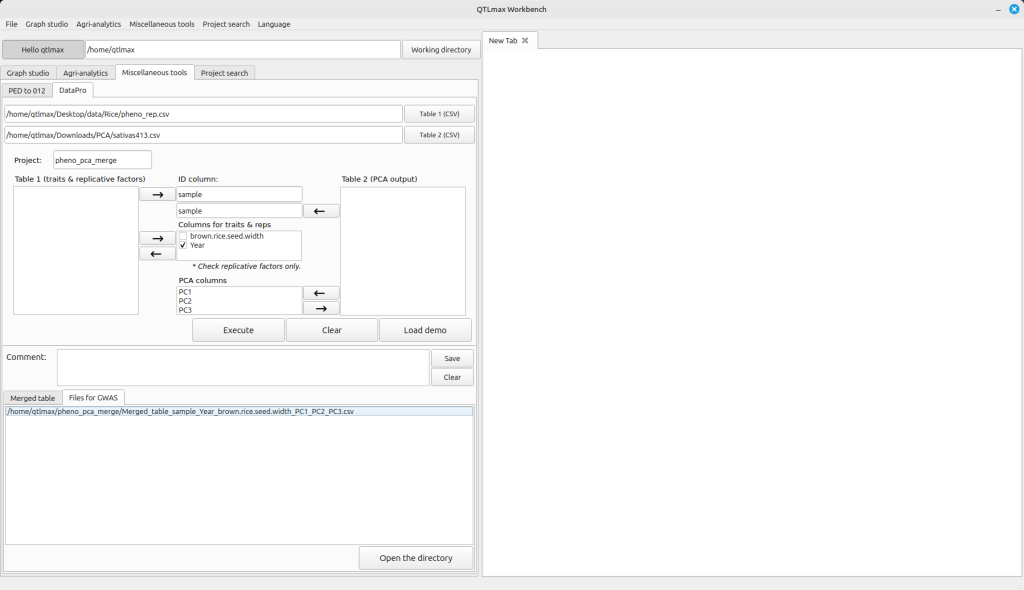
Figure 3.